Understanding the Basics of Light Fixtures
Before we dive into connecting two light fixtures, it is essential to understand the basics of light fixtures. A light fixture is a device used to create artificial light using an electric lamp. They come in various shapes, sizes, and designs, and are typically used to illuminate spaces in our homes, offices, and other buildings. In this section, we will discuss the primary components of a light fixture, including the lamp, the socket, and the wiring. By understanding these basics, you will be better prepared to connect two light fixtures successfully.
Tools and Materials Needed for Connecting Light Fixtures
Connecting two light fixtures may seem like a daunting task, but with the right tools and materials, it can be a simple and straightforward process. In this section, we will discuss the essential tools and materials needed for connecting light fixtures. These may include a screwdriver, wire stripper, wire nuts, electrical tape, and a voltage tester. Additionally, you will need the light fixtures themselves, as well as any mounting hardware and electrical wiring required for the connection. By gathering these items beforehand, you can ensure a smooth and efficient installation process.
Preparing the Light Fixtures for Connection
Before you begin connecting the light fixtures, it is crucial to prepare them for the connection process. This may involve removing any existing wiring or mounting hardware, as well as ensuring that the fixtures are clean and free of dust or debris. In this section, we will discuss the steps involved in preparing your light fixtures for connection, including:
- Turning off the power supply to the area where the fixtures will be installed
- Removing any existing wiring or mounting hardware
- Cleaning the fixtures and surrounding area
- Inspecting the fixtures for any damage or defects
By taking the time to properly prepare your light fixtures, you can ensure a safe and successful connection process.
Connecting the Wiring for the Light Fixtures
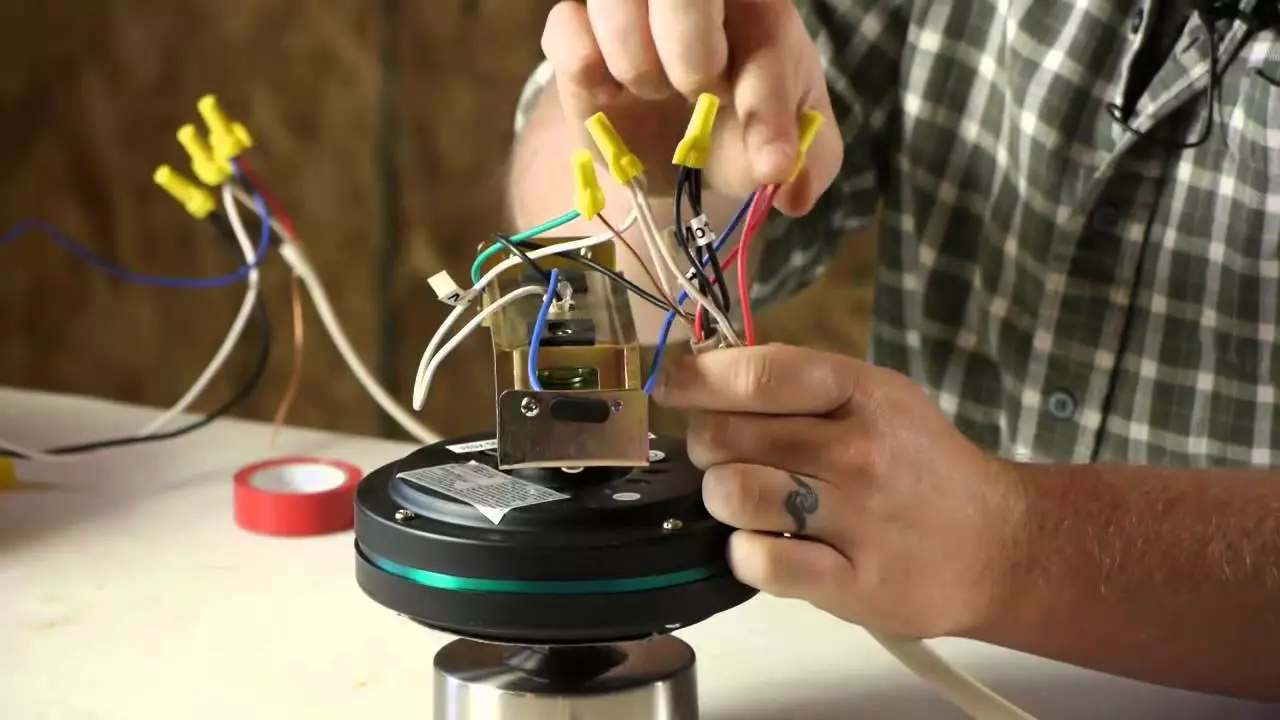
Once your light fixtures are prepared, the next step is to connect the wiring. This is an essential step, as it ensures that the electrical current is able to flow between the fixtures and power the lamps. In this section, we will discuss the process of connecting the wiring for your light fixtures, including:
- Stripping the ends of the wires to expose the copper wiring
- Twisting the corresponding wires together (e.g., black to black, white to white, and green or copper to green or copper)
- Securing the connections with wire nuts
- Wrapping the connections with electrical tape
- Testing the connections with a voltage tester
By following these steps, you can ensure a secure and reliable connection between your light fixtures.
Mounting and Securing the Light Fixtures
With the wiring connected, the next step is to mount and secure the light fixtures. This process may vary depending on the type of fixtures you are installing and the surface they will be mounted on. In this section, we will discuss the general process for mounting and securing your light fixtures, including:
- Attaching any necessary mounting hardware to the fixtures
- Positioning the fixtures in their desired locations
- Securing the fixtures to the surface using screws or other mounting hardware
- Ensuring that the fixtures are level and properly aligned
By following these steps, you can ensure that your light fixtures are securely mounted and ready to be powered on.
Testing and Troubleshooting the Connected Light Fixtures
Once your light fixtures are connected and mounted, the final step is to test and troubleshoot the installation. This may involve turning on the power supply, checking for any flickering or dimming, and ensuring that the fixtures are functioning as intended. In this section, we will discuss the process of testing and troubleshooting your connected light fixtures, including:
- Turning on the power supply to the area where the fixtures are installed
- Checking for any flickering, dimming, or other issues with the fixtures
- Inspecting the wiring connections and mounting hardware for any problems
- Addressing any issues and making necessary adjustments
By following these steps, you can ensure that your connected light fixtures are functioning properly and safely. Remember, if you encounter any issues or are unsure about any part of the installation process, it is always best to consult with a licensed electrician.

Write a comment